
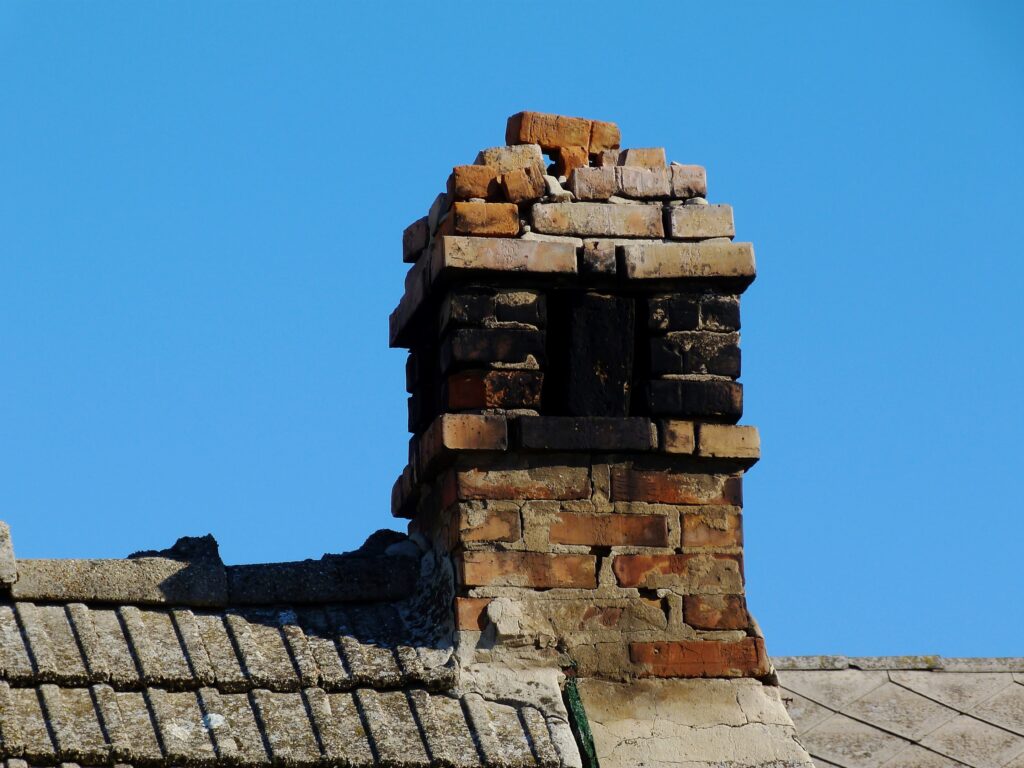
Brick chimneys are classic and durable, but after years of facing the elements, they often show signs of wear and tear like spalling or cracking. This begs the question, Can you stucco over a brick chimney?
The answer is yes! Stucco is a fantastic way to revive a tired-looking chimney, protect it from further damage, and give your home a modern, polished look.
But before grabbing that trowel, there are some key steps and considerations to creating a flawless and long-lasting stucco finish.
This guide breaks down everything you need to know, from preparation to materials, costs, and expert tips, to ensure your stucco chimney stands the test of time.

What Is Stucco and How Is It Used on Chimneys?
Stucco is a versatile and durable material commonly used on buildings and chimneys to create a smooth or textured finish.
Typically, stucco is made from Portland cement, sand, lime, and water. It can be applied directly over brick under certain conditions and usually involves three layers: the scratch coat, brown coat, and finish coat.
Once dried, stucco forms a solid and weather-resistant coating that protects the underlying structure from moisture, wind, and other environmental elements.
When applied over a brick chimney, stucco not only improves its appearance but also helps solve issues like spalling bricks, mortar deterioration, and uneven surfaces.
Benefits of Applying Stucco on a Brick Chimney
Why go through the effort of stuccoing over your chimney? There are several compelling reasons:
Enhanced Aesthetics
Transform your chimney’s appearance with a sleek, modern finish or add decorative textures for a unique look.
Weather Resistance
A properly applied stucco layer protects the chimney from rain, snow, wind, and UV rays, reducing wear and tear over time.
Fixing Issues Like Spalling Brick
Stucco creates a uniform surface, covering up unsightly spalling (flaking) bricks and reinforcing the chimney structure.
Improved Energy Efficiency
Stucco seals gaps and cracks, helping to insulate your chimney and preventing drafts or heat loss.
Longevity
With proper maintenance, stucco chimneys can last decades, making it a worthwhile investment for your home.

Understand the Costs and Factors
One of the most common questions homeowners have is, “How much will this cost?” The cost of stuccoing over a brick chimney depends on several factors:
- Area Based on Square Foot: Larger chimneys will naturally require more materials and labor.
- Complexity of the Job Site: Factors like difficult-to-reach areas or intricate designs can drive up labor costs.
- Quality of Materials: Premium stucco mixes and finishes may cost more up front but can save you money in repair work later.
- Time of Year: Winter conditions can complicate the process. Ideally, plan your stucco project for warmer months to ensure proper curing.
Budget Tip
Invest in professional expertise to avoid costly mistakes. While DIY solutions may save money initially, improper application can lead to expensive repairs down the line.
Pro Tip 1: Properly Inspect and Prepare the Brick Chimney
Before adding any material to your chimney, it’s crucial to assess its current condition.
Stucco is only as strong and durable as the foundation beneath it. Attempting to apply stucco over damaged or unstable bricks can lead to expensive issues down the line.
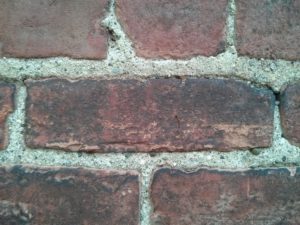
The bricks must be clean, stable, and free from significant damage like spalling (where the brick face breaks off). If these conditions are not met, the stucco might not adhere properly, leading to cracks or flaking over time.
What to Look For During Inspection:
- Structural Stability: Are there loose pieces? Are the bricks and mortar intact?
- Moisture Issues: Ensure there’s no excess moisture, as damp bricks can compromise the adhesion of the stucco.
- Soot or Creosote Buildup (for active chimneys): Clean any soot or debris, as these can prevent proper adhesion of the stucco mix.
Here’s what you need to do:
- Clean the Surface: Use a power washer to remove dirt, debris, and loose mortar from the brick chimney. A clean surface is essential for the stucco to bond effectively.
- Repair Damage: Inspect your chimney for issues like cracks, loose bricks, or areas with severe spalling. Address these first by repairing or replacing damaged bricks and repointing mortar joints.
- Add a Bonding Agent: Apply a high-quality masonry bonding agent to the bricks. This step is crucial as it ensures the stucco will adhere properly to the brick surface.
- Install Metal Lath: For extra stability and adhesion, attach a metal lath over the bricks using galvanized masonry nails. It is a galvanized mesh material that creates the perfect surface for proper stucco adhesion. Fasten the lath tightly over the chimney with corrosion-resistant nails or screws. This step is particularly important for older brick chimneys with surfaces that may no longer bond well on their own. This acts as a supportive base for the stucco and prevents cracking over time.
By tackling these preparation steps thoroughly, you’re laying the groundwork for a quality job that will withstand the test of time.
Pro Tip 2: Choose the Right Stucco Mix for Chimneys
Not all stucco mixes are created equal. When it comes to chimney applications, selecting the right type of stucco is critical for a long-lasting finish.
Recommended Stucco Types:
- Traditional Stucco (Cement-Based): Made from cement, sand, and lime, this mix offers excellent durability and water resistance, making it ideal for exterior stucco chimneys.
- Synthetic Stucco (EIFS): A lighter option that includes polymers for added flexibility, reducing the risk of cracking in areas prone to temperature fluctuation.
Key Considerations:
- Ensure the mix is formulated for exterior application to withstand weather conditions.
- Use water-resistant or fiber-reinforced variations for added strength.
- Always mix and apply according to the manufacturer’s recommendations to avoid uneven texture or poor adhesion.
Opting for the right stucco mix ensures your chimney not only looks great but also stands up to weather and wear.
Pro Tip 3: Master the Three-Coat Stucco Application Method
For creating a durable stucco chimney, the three-coat application method is considered the gold standard. It involves the following layers:

Scratch Coat
This first layer is key to creating a strong base.
- Use a trowel to apply a 1/4-inch thick layer evenly.
- Once applied, lightly score the surface with a notched trowel to create a rough texture for the next layer to adhere.
Brown Coat
After the scratch coat dries (24-48 hours), apply a second layer around 3/8-inch thick.
- Smooth this coat with a trowel, ensuring an even surface.
Finish Coat
The final coat (⅛-inch thick) determines the texture and appearance of your chimney.
- Options include smooth, pebble-dash, or even a stucco chimney cap style for a unique finish.
- Choose a finish that complements your home’s exterior for a cohesive look.
Give each layer ample time to dry as per guidelines to maximize strength. The entire process, from the scratch coat to the final coat, can take several days. Rushing between stages can lead to improperly cured layers, increasing the risk of damage.
Quick Note
If you notice signs of improper application or large areas of stucco damage, it’s best to call an expert to handle the repair work.
Pro Tip 4: Consider Adding a Stucco Chimney Cap
A stucco chimney cap not only enhances the chimney’s style, but it also serves a functional purpose. Caps prevent water penetration, keep debris out, and protect the upper edges of the stucco.
Styles to Consider:
- Integrated stucco caps for a seamless look
- Decorative precast caps for a more elegant finish
Adding a chimney cap completes the look while prolonging the life of your stucco chimney.
Pro Tip 5: Plan for Maintenance and Repairs
Even if executed flawlessly, stucco chimneys require periodic upkeep to maintain their appearance and functionality.
Seal and Paint
Apply a protective sealant over the finish stucco to safeguard against moisture and potential water damage. For added visual appeal, consider painting your chimney with weather-resistant paint.
Inspect Regularly
Make routine inspections a part of your home maintenance schedule. Look for small cracks, peeling paint, or other minor damage. If caught early, repair work for such issues is quick and far less costly than major structural damage.
Weatherproof Your Investment
Winter months can be the worst part for homeowners with improperly maintained chimneys. Use weatherproof materials to shield your chimney from freezing temperatures and water infiltration.
Expert Guidance
If time, labor, or expertise becomes hurdles in the process, contact professional services. Their knowledge can save both money and frustration, offering peace of mind that your project is being handled by experts.
Making the Decision to Stucco Over a Brick Chimney
Stuccoing over a brick chimney is a practical and stylish upgrade for homeowners seeking durability, protection, and enhanced curb appeal. By following these five professional tips, you’ll achieve a high-quality finish that transforms your chimney into a polished feature of your home’s exterior.
And while applying stucco over a brick chimney can be a DIY project, it’s a process that requires skill, patience, and attention to detail. From preparing the surface to applying multiple layers with precision, there are plenty of opportunities for error if you’re not experienced. But there’s good news! Our chimney service professionals have the expertise to ensure your chimney’s transformation is smooth, durable, and stunning.
If you want to maintain the integrity of your home and ensure decades of beauty and durability, don’t leave anything to chance. Our experienced team specializes in chimney repairs and stucco installations. Contact us today to discuss options, get a quote, or schedule a consultation. Together, we’ll bring your vision to life.
 Montgomery County PA Masonry Experts